happy-envi-viewer
Usage#
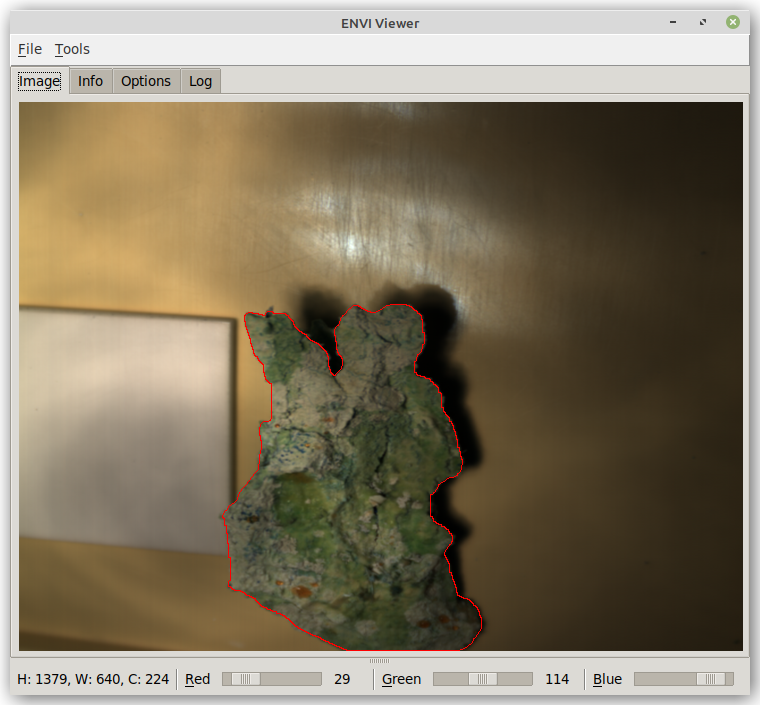
Image tab#
Via the File menu, you can load an ENVI file representing a sample scan.
From that menu, you can also select black and white reference ENVI files that get automatically applied to the scan:
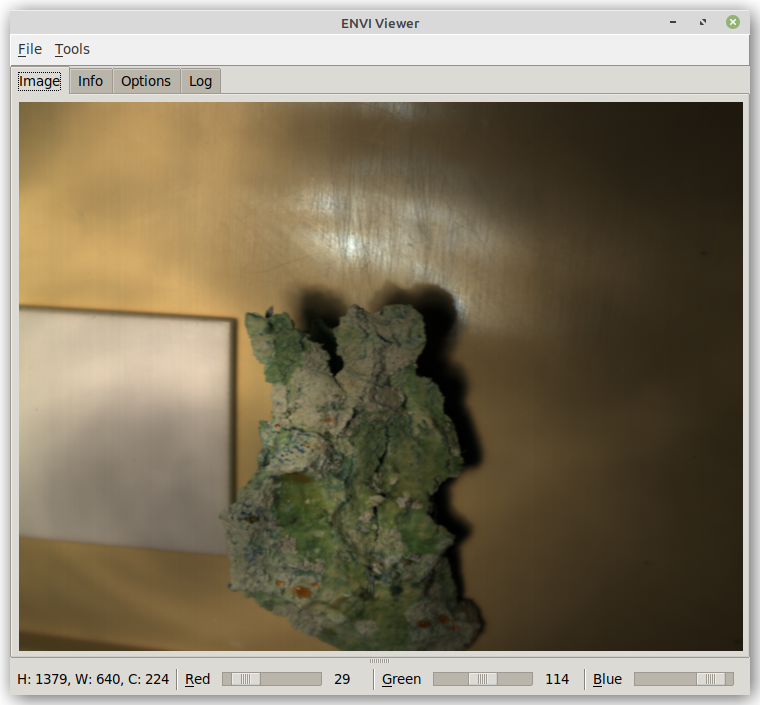
At the bottom of the window, you get a quick info on what dimensions the scan has (width, height and channels).
The three sliders allow you to select the channels from the hyperspectral image to act as red, green and blue channel for the fake RGB image that is being displayed. Left-clicking on the label next to the slider, depicting the current channel value, pops up a dialog for entering a specific channel. If default bands are defined in the ENVI header and auto-detect channels is enabled on the Options tab, then these will get used when loading the file.
Info tab#
On the Info tab, you can see what files are currently loaded and what dimensions these files have:

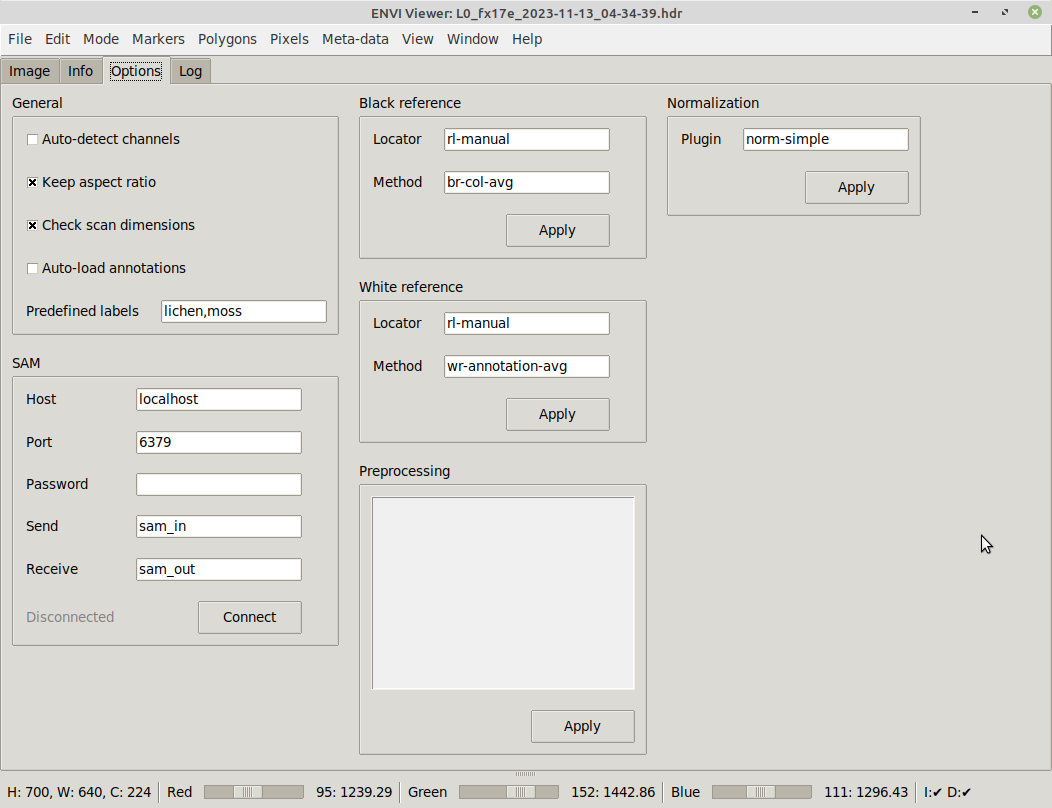
Options tab#
On the Options tab, you can change various view settings, how to connect to SAM and how annotations appear:
Annotations#
The envi-viewer also allows you to annotate images and then export them. The image will be exported as PNG using the currently selected channels. Any annotations present will get exported as JSON, using the OPEX format. Such annotations in OPEX format can be viewed in the ADAMS Preview browser.
General mouse usage:
- Left-clicking on the image sets a marker point.
- Left-clicking while holding the CTRL key removes any marker points.
- Left-clicking on an existing annotation shape while holding the SHIFT key
allows you to enter a label for that shape (e.g.,
white_reforleaf).
Tools menu:
- Clear annotations - removes any annotations
- Clear markers - removes all marker points
- Remove last annotation - removes the most recent annotation that was added (can be repeated till there are no more annotations)
- Polygon - turns current marker points into polygon
- SAM - uses current marker points as prompt points for SAM
Polygons#
The simplest way of annotating that does not require any further tools is by using polygons. First define the outline of the object with marker points:
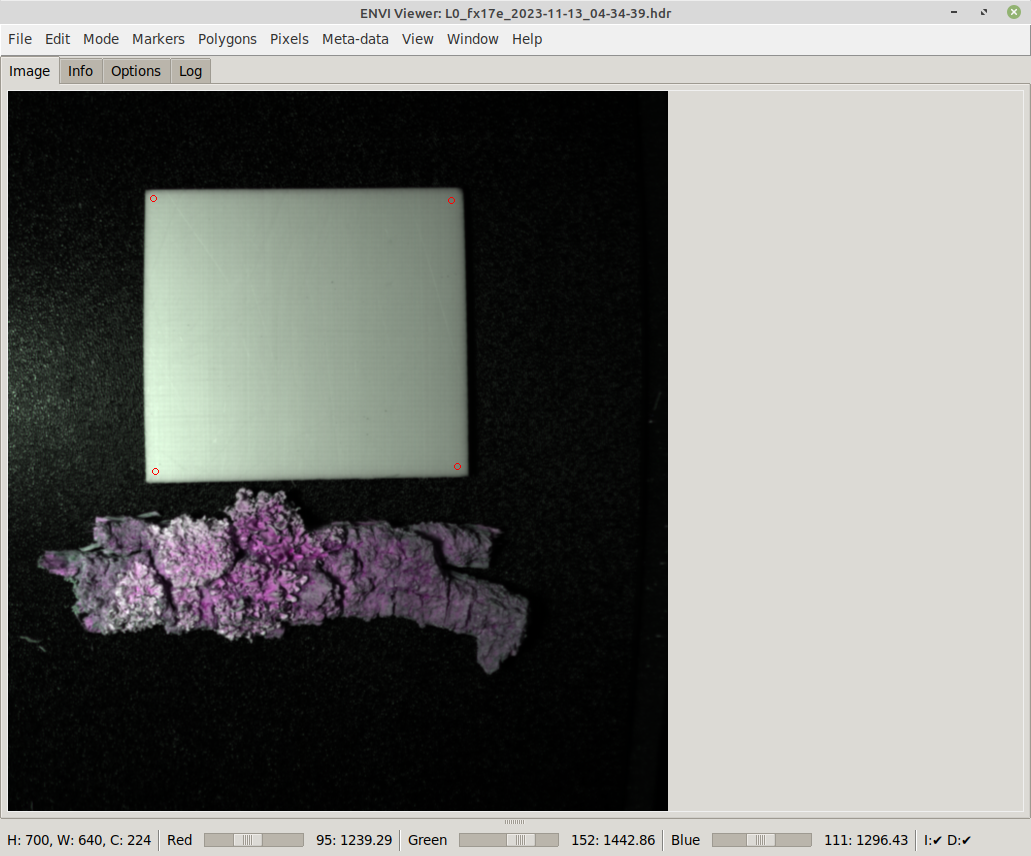
Once at least three marker points have been put on the image, selecting Polygon from the Tools menu turns them into a polygon annotation:

SAM#
Using SAM, you can easily annotate complex shapes accurately. Though SAM can run on a CPU, it is recommended to use a computer with a NVIDIA GPU as it will speed up the detection process by at least 10 times.
SAM requires you to at least provide a single marker on the object that you want to trace the shape for. Depending on the object and how well it is separated from the background, how much the colors on the object change, you may have to provide more than one marker point to better guide the detection:
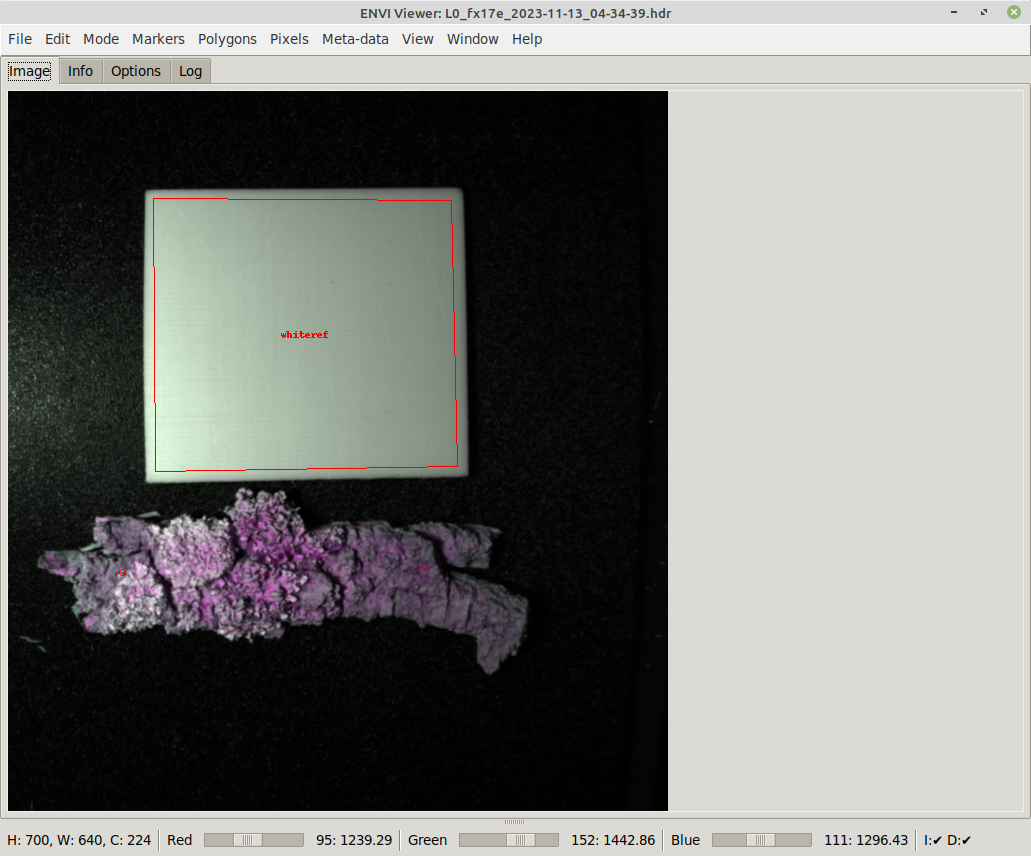
The result looks then like this:
Command-line#
Using the command-line options, you can preset the options in the user interface and also load scan, black and white reference files:
usage: happy-envi-viewer [-h] [-s SCAN] [-f BLACK_REFERENCE]
                         [-w WHITE_REFERENCE] [-r INT] [-g INT] [-b INT]
                         [--autodetect_channels] [--keep_aspectratio]
                         [--check_scan_dimensions] [--export_to_scan_dir]
                         [--annotation_color HEXCOLOR]
                         [--predefined_labels LIST] [--redis_host HOST]
                         [--redis_port PORT] [--redis_pw PASSWORD]
                         [--redis_in CHANNEL] [--redis_out CHANNEL]
                         [--redis_connect] [--marker_size INT]
                         [--marker_color HEXCOLOR] [--min_obj_size INT]
                         [--black_ref_locator LOCATOR]
                         [--black_ref_method METHOD]
                         [--white_ref_locator LOCATOR]
                         [--white_ref_method METHOD]
                         [--preprocessing PIPELINE]
                         [--log_timestamp_format FORMAT] [--zoom PERCENT]
                         [--normalization PLUGIN]
                         [-V {DEBUG,INFO,WARNING,ERROR,CRITICAL}]

ENVI Hyperspectral Image Viewer. Offers contour detection using SAM (Segment-
Anything: https://github.com/waikato-datamining/pytorch/tree/master/segment-
anything)

optional arguments:
  -h, --help            show this help message and exit
  -s SCAN, --scan SCAN  Path to the scan file (ENVI format) (default: None)
  -f BLACK_REFERENCE, --black_reference BLACK_REFERENCE
                        Path to the black reference file (ENVI format)
                        (default: None)
  -w WHITE_REFERENCE, --white_reference WHITE_REFERENCE
                        Path to the white reference file (ENVI format)
                        (default: None)
  -r INT, --scale_r INT
                        the wave length to use for the red channel (default:
                        None)
  -g INT, --scale_g INT
                        the wave length to use for the green channel (default:
                        None)
  -b INT, --scale_b INT
                        the wave length to use for the blue channel (default:
                        None)
  --autodetect_channels
                        whether to determine the channels from the meta-data
                        (overrides the manually specified channels) (default:
                        None)
  --keep_aspectratio    whether to keep the aspect ratio (default: None)
  --check_scan_dimensions
                        whether to compare the dimensions of subsequently
                        loaded scans and output a warning if they differ
                        (default: None)
  --export_to_scan_dir  whether to export images to the scan directory rather
                        than the last one used (default: None)
  --annotation_color HEXCOLOR
                        the color to use for the annotations like contours
                        (hex color) (default: None)
  --predefined_labels LIST
                        the comma-separated list of labels to use (default:
                        None)
  --redis_host HOST     The Redis host to connect to (IP or hostname)
                        (default: None)
  --redis_port PORT     The port the Redis server is listening on (default:
                        None)
  --redis_pw PASSWORD   The password to use with the Redis server (default:
                        None)
  --redis_in CHANNEL    The channel that SAM is receiving images on (default:
                        None)
  --redis_out CHANNEL   The channel that SAM is broadcasting the detections on
                        (default: None)
  --redis_connect       whether to immediately connect to the Redis host
                        (default: None)
  --marker_size INT     The size in pixels for the SAM points (default: None)
  --marker_color HEXCOLOR
                        the color to use for the SAM points (hex color)
                        (default: None)
  --min_obj_size INT    The minimum size that SAM contours need to have (<= 0
                        for no minimum) (default: None)
  --black_ref_locator LOCATOR
                        the reference locator scheme to use for locating black
                        references, eg rl-manual (default: None)
  --black_ref_method METHOD
                        the black reference method to use for applying black
                        references, eg br-same-size (default: None)
  --white_ref_locator LOCATOR
                        the reference locator scheme to use for locating
                        whites references, eg rl-manual (default: None)
  --white_ref_method METHOD
                        the white reference method to use for applying white
                        references, eg wr-same-size (default: None)
  --preprocessing PIPELINE
                        the preprocessors to apply to the scan (default: None)
  --log_timestamp_format FORMAT
                        the format string for the logging timestamp, see: http
                        s://docs.python.org/3/library/datetime.html#strftime-
                        and-strptime-format-codes (default: [%H:%M:%S.%f])
  --zoom PERCENT        the initial zoom to use (%) or -1 for automatic fit
                        (default: -1)
  --normalization PLUGIN
                        the normalization plugin and its options to use
                        (default: norm-simple)
  -V {DEBUG,INFO,WARNING,ERROR,CRITICAL}, --logging_level {DEBUG,INFO,WARNING,ERROR,CRITICAL}
                        The logging level to use. (default: WARN)